DIY: My Ocean Themed Manicure
Since yesterday’s Instagram photo of my oceanic coral reef manicure was so popular I decided to write a special DIY post. Doing my own nails is a very Zen activity for me and one of my favorite methods to de-stress. Actually, it’s one of the few ways I can keep myself off my phone or computer for an extended period of time.
Click below to see how easily you can do these nails on yourself!
Materials needed:
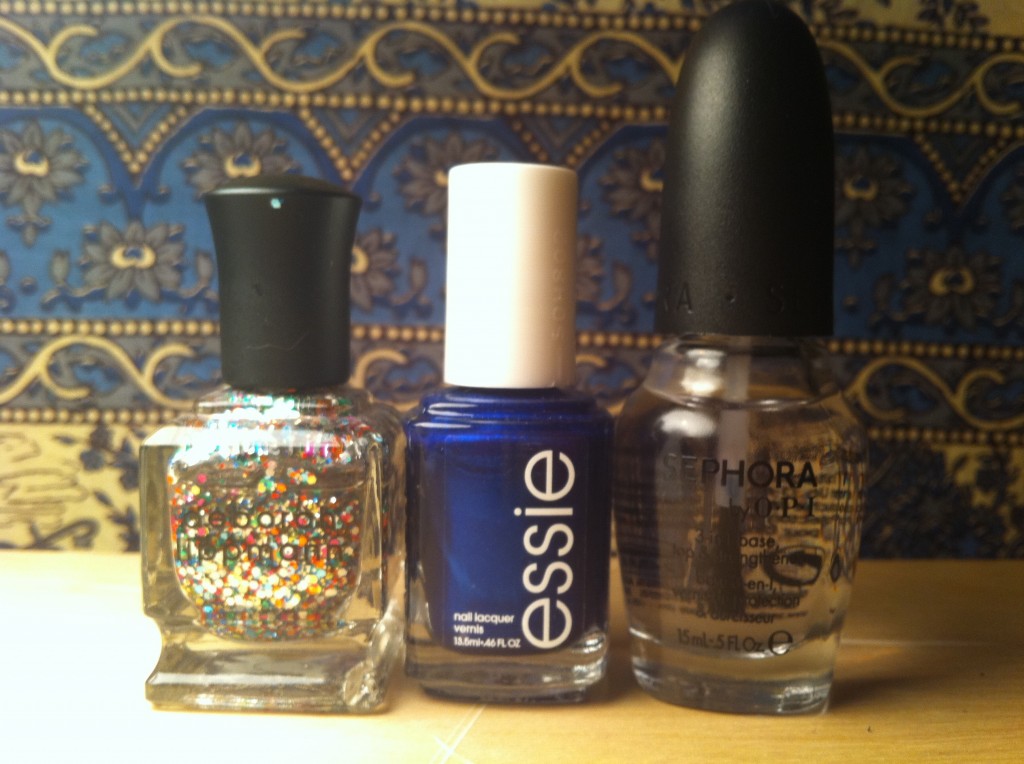
1. Essie’s Aruba (any deep blue)
2. Deborah Lippmann’s Happy Birthday (any clear polish with multicolored glitter)
3. Sephora for OPI 3-in-1 top, base, and nail strengthener (I highly recommend you purchase this)
To create the Reef manicure you need only to follow these easy steps and be very, very patient.
STEP ONE
Lay down a clear base coat on your clean, nail-polish free nails. The reason I recommend the Sephora OPI 3-in-1 polish is because you’re going to be layering nail polishes several times, and this specific polish is the perfect way to bond the layers together since it’s both a top and base coat.
STEP TWO
Brush on a sheer, thin coating of your blue polish. It’s ok if you can still see see the nails. Wait 10 minutes for it dry.
STEP THREE
Brush on a second, sheer coating of the blue polish. Wait another 10 minutes to dry.
STEP FOUR
Brush on the Sephora OPI 3-in-1 clear polish.
STEP FIVE
Dab on the multicolored glitter close to your cuticle and then brush lightly upwards. The goal is to have most of the glitter end up close to the nailbed, but you do want some glitter throughout the nail (this will be painted over with blue polish to become your bubbles). Try your best to ombre it. Don’t worry if it’s not perfect, you’re going to paint over it a few steps down. Wait another 15 minutes for glitter polish to dry (this takes a while).
STEP SIX
Once the first later of glitter is dry (or somewhat dry), take your glitter polish brush and dab a lot on close to the cuticle on each nail. This is where you build the reef. You can do this once, or as many times as you like, until the glitter looks right. I did this twice. You have to keep dipping the brush into the polish to collect more glitter.
STEP SEVEN
Next, you take the blue polish and you paint from the tip of your nail back to the reef. The glitter that you’re covering up is going to look like bubbles floating up from the reef. Paint however you like! I tried to stagger mine to keep the look organic and so that the reef looked well, like a reef! Wait 20 minutes for the glitter polish and the blue polish to get good and dry.
STEP EIGHT
Final top coat! Brush the Sephora OPI 3-in-1 over the entire nail once layer at a time. Wait five minutes between each layer. I did this three times on each finger and four times on my thumbs (which had a lot of glitter). You want your fingernails to feel smooth so that the glitter is adequately lacquered on and sealed onto the nail. A strong topcoat will keep this manicure in good shape for at least 5 to 7 days.
STEP NINE
Be VERY, VERY, careful for the next few HOURS. Your nails will still be hardening for a while since we used so much topcoat and glitter. Take care to let the polish set.
STEP TEN
Enjoy your Ocean Reef manicure!!!


Very cool, Amy! I’m going to have to try this myself, thanks for sharing!
xx
Ashlei
Yes! Thank you so much for this “how to”. I’ve been wondering how people do this.
Awesome! I’ll definitely be trying something similar. 🙂
Love!! Totally inspiring me to try to do some DIY nails 🙂
doing this NOW
Super cool! I pinned your DIY Coral Reef photo on pinterest: 23 repins in less than an hour! Apparently this look is a hit! 🙂
Deborah Lippmann’s Happy Birthday is one of my favorites!
awesome DIY!
🙂
@Wendy thanks so much for pinning my Coral Reef manicure to your pinterest board!